
Snagging Inspection Dubai: Complete Checklist Before Accepting Your Property (2026)

- What: A snagging inspection identifies construction defects before you officially accept your new property from the developer.
- When: Always before signing the handover certificate — once you sign, your leverage drops significantly.
- Cost: Professional snagging services run AED 1,500–3,000 for apartments, AED 3,000–5,000+ for villas.
- Defect liability: Developers are responsible for structural defects for 10 years and finishing defects for 1 year after handover under Dubai law.
- Key areas: Paint, tiles, plumbing pressure, electrical outlets, AC performance, window seals, door alignment, waterproofing, and countertops.
- If disputes arise: RERA and Dubai Land Department provide formal complaint channels when developers refuse to fix legitimate defects.
You have waited years for your off-plan property in Dubai. The developer finally sends the handover notice, and excitement takes over. But signing that handover certificate without a thorough snagging inspection is one of the most expensive mistakes buyers make in Dubai real estate.
A snagging inspection — also called a defect inspection or punch list — is your one opportunity to document every flaw, defect, and unfinished item in your new property while the developer is still legally obligated to fix them. This guide provides a complete, room-by-room snagging inspection Dubai checklist so you know exactly what to look for, how to document it, and how to hold your developer accountable.
What Is a Snagging Inspection?
Snagging is the process of systematically inspecting a newly built or newly handed-over property to identify construction defects, poor workmanship, incomplete finishes, and items that do not match the original specifications or sales brochure. The term originates from British construction terminology and is widely used across the UAE property market.
Common categories of snags include:
- Cosmetic defects: Paint drips, scratched surfaces, chipped tiles, uneven grouting
- Functional defects: Doors that do not close properly, windows that do not seal, plumbing leaks, electrical faults
- Specification mismatches: Different materials, finishes, or fixtures than what was promised in the SPA (Sale and Purchase Agreement)
- Incomplete work: Missing fixtures, unfinished painting, exposed wiring, absent sealant
- Structural concerns: Cracks in walls or ceilings, uneven flooring, water ingress
Why Snagging Matters in Dubai
Dubai's construction boom means thousands of units are handed over every year, often under tight developer timelines. While quality standards have improved significantly over the past decade, defects remain common even in premium developments. Here is why snagging is non-negotiable:
The defect liability period (DLP) under UAE law gives developers a defined responsibility window. According to Dubai's building regulations and RERA guidelines, developers are liable for structural defects for 10 years and finishing/non-structural defects for 1 year from the date of handover. Once this period expires, repairs become entirely your responsibility.
Your leverage disappears after signing. Before you sign the handover certificate, the developer needs your signature to complete the transaction and release escrow funds. This is your strongest negotiating position. After signing, you are simply one of hundreds of owners submitting maintenance requests.
Resale and rental value. Unresolved defects affect your property's value and rental potential. A properly snagged and repaired unit commands better returns.
When to Schedule Your Snagging Inspection
Timing matters. Here is the ideal sequence:
- Developer issues completion notice: You receive a handover invitation letter or email.
- Initial walkthrough: The developer invites you for a first viewing of your unit. Use this visit to get a general feel, but do not sign anything yet.
- Snagging inspection: Schedule your professional or DIY snagging inspection within the first few days after gaining access. Ideally, do this before the formal handover appointment.
- Submit snagging report: Present the documented list of defects to the developer in writing.
- Developer fixes defects: The developer schedules repairs, typically within 30–60 days.
- Re-inspection (second snagging): Verify all reported defects have been properly resolved.
- Sign handover certificate: Only after you are satisfied with the condition of the unit.
DIY vs Professional Snagging Inspection
You have two options: do it yourself or hire a professional snagging company. Both have merit, depending on your experience and the property type.
| Factor | DIY Snagging | Professional Snagging |
|---|---|---|
| Cost | Free (your time only) | AED 1,500–3,000 (apartment), AED 3,000–5,000+ (villa) |
| Expertise | Depends on your knowledge | Trained engineers with specialized tools |
| Equipment | Basic tools from hardware store | Thermal cameras, moisture meters, laser levels |
| Report quality | Informal notes and photos | Professional PDF report with numbered items |
| Developer response | May push back on subjective items | Professional reports carry more weight |
| Time required | 3–5 hours (apartment), full day (villa) | 2–4 hours (apartment), 4–8 hours (villa) |
| Best for | Studios, 1-beds, experienced buyers | Large units, villas, first-time buyers |
Tools You Need for DIY Snagging
If you decide to inspect the property yourself, bring these items:
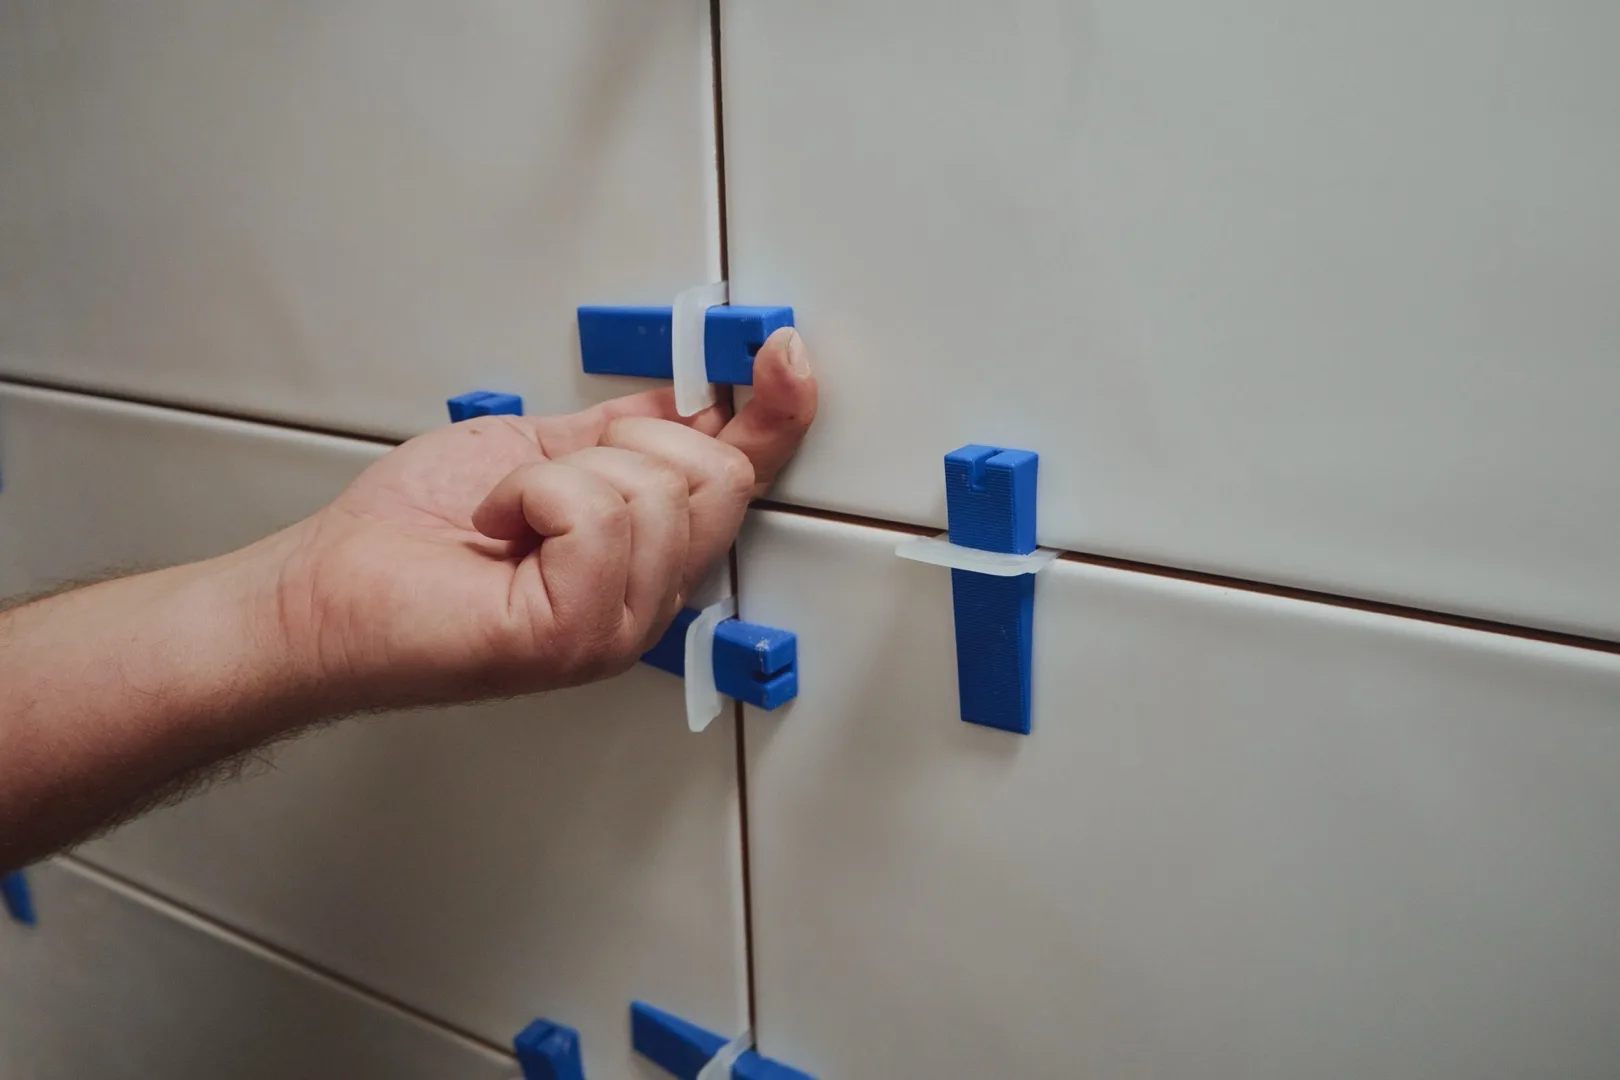
- Smartphone with a good camera: For photographing every defect with location context
- Blue painter's tape (masking tape): Stick next to each defect so it is visible in photos and to workers
- Spirit level (60cm minimum): To check walls, floors, and countertops are level
- Tape measure: To verify room dimensions match the floor plan
- Flashlight or phone torch: To inspect under cabinets, inside wardrobes, and dark corners
- Electrical tester (socket tester): Plug-in device that checks if outlets are wired correctly — available for under AED 30
- Notebook and pen: For quick notes alongside your photos
- Your SPA and floor plan: To compare specifications and room sizes
- A tennis ball or marble: To check floor leveling — place it on the floor and see if it rolls
- Tissue paper: For checking draft from window seals and detecting water leaks around fixtures
Room-by-Room Snagging Checklist
This is the core of your snagging inspection. Work through each area methodically. Do not rush — a typical 2-bedroom apartment has 200–400 items to check.
Entrance and Hallway
| Item | What to Check | ✓ |
|---|---|---|
| Front door | Opens/closes smoothly, lock works, no scratches, proper seal, peephole functional | ☐ |
| Door frame | No gaps between frame and wall, paint finish clean, no dents | ☐ |
| Walls | Paint even, no roller marks, no cracks, no nail pops, no scuff marks | ☐ |
| Ceiling | Level, no cracks, paint consistent, no water stains | ☐ |
| Flooring | Level (use marble test), no chipped tiles, grouting complete, no hollow tiles (tap test) | ☐ |
| Light switches | All work, plates flush with wall, no cracks in cover plates | ☐ |
| Electrical panel | Labeled correctly, door closes properly, all breakers functional | ☐ |
| Intercom/video phone | Screen works, audio clear, door release functional | ☐ |
Living and Dining Areas
| Item | What to Check | ✓ |
|---|---|---|
| Walls (all surfaces) | Consistent paint, no bubbling, no damp patches, corners clean | ☐ |
| Windows | Open and close smoothly, locks work, rubber seals intact, no condensation between panes | ☐ |
| Window sills | Properly sealed, no gaps, no chipping, level | ☐ |
| AC vents and units | Cold air blows within 5 minutes, no unusual noise, vents secure, thermostat responsive | ☐ |
| Power outlets | All functional (use tester), plates flush, correct wiring polarity | ☐ |
| TV and data points | Cable connections present and accessible, cover plates installed | ☐ |
| Flooring | Level throughout, consistent pattern, no scratches on marble/wood, no hollow tiles | ☐ |
| Skirting boards | Properly attached, no gaps at top or bottom, paint/finish consistent | ☐ |
| Ceiling lights | All working, fixtures secure, no flickering | ☐ |
Kitchen
| Item | What to Check | ✓ |
|---|---|---|
| Countertops | No chips or cracks, edges smooth and polished, joints sealed, level surface | ☐ |
| Cabinets (upper and lower) | Doors aligned, soft-close works, hinges tight, no scratches on faces, shelves level | ☐ |
| Drawers | Slide smoothly, runners not bent, soft-close functional, fronts aligned | ☐ |
| Sink and taps | No leaks (check underneath), hot and cold work, adequate pressure, drain flows freely | ☐ |
| Splashback | Tiles aligned, grouting complete, sealed at countertop junction | ☐ |
| Appliances (if included) | Oven heats, hob ignites, extractor fan works, dishwasher runs a cycle, fridge cools | ☐ |
| Gas connection | Properly sealed, no smell, shut-off valve accessible | ☐ |
| Plumbing under sink | No visible leaks, waste pipe connected, sealant applied at wall penetrations | ☐ |
| Electrical outlets | Sufficient number, all working, positioned per spec (check SPA) | ☐ |
| Floor tiles | No cracks, grouting even, no hollow sounds when tapped | ☐ |
Bathrooms (Check Each One)
| Item | What to Check | ✓ |
|---|---|---|
| Toilet | Flushes fully, no rocking, cistern fills and stops, no leaks at base, seat secure | ☐ |
| Basin/vanity | No chips, drains properly, overflow works, tap hot/cold functional, no leaks below | ☐ |
| Shower | Adequate pressure, hot water reaches within 30 seconds, glass door/screen secure, drain works | ☐ |
| Bathtub (if present) | No chips or scratches, fills and drains, sealant around edges, taps work, plug holds water | ☐ |
| Wall tiles | All tiles secure (tap test), grout lines even, no cracked or chipped tiles, pattern consistent | ☐ |
| Floor tiles | No hollow tiles, grout sealed, slight slope toward drain (pour water to test) | ☐ |
| Waterproofing | Silicone sealant at all junctions (floor-wall, around shower, around basin), no gaps | ☐ |
| Mirror and accessories | Securely mounted, no scratches, towel rails tight, toilet roll holder present | ☐ |
| Exhaust fan | Operates when switched on, adequate suction (tissue paper test at vent) | ☐ |
| Door | Lock works from inside, adequate clearance above floor, no warping | ☐ |
Bedrooms
| Item | What to Check | ✓ |
|---|---|---|
| Built-in wardrobes | Doors aligned, slide/swing smoothly, shelves level, hanging rails secure, interior finish clean | ☐ |
| Wardrobe interiors | Light works (if fitted), no rough edges, drawers functional, handles tight | ☐ |
| Windows | Same checks as living area — seals, locks, smooth operation | ☐ |
| AC performance | Room cools within 10 minutes, no unusual noise, vent positioned correctly | ☐ |
| Walls and ceiling | Paint quality, no cracks, no damp patches, consistent color | ☐ |
| Power outlets | Bedside outlets present, all functional, USB ports work (if included) | ☐ |
| Flooring | Level, no scratches, consistent pattern, transitions to other rooms clean | ☐ |
| Room dimensions | Measure and compare to SPA floor plan — note any discrepancies over 5% | ☐ |
Balcony and Terrace
| Item | What to Check | ✓ |
|---|---|---|
| Sliding/French doors | Slide smoothly, lock securely, rubber seals intact, no gaps when closed | ☐ |
| Floor tiles | Slight slope away from interior for drainage, no pooling, tiles not cracked | ☐ |
| Drainage | Drain present and not blocked, water flows toward drain | ☐ |
| Railings | Secure, no wobbling, correct height (minimum 1.1m), no sharp edges, glass panels intact | ☐ |
| Ceiling/soffit | Paint finish, no exposed concrete, no water staining from above | ☐ |
| External power outlet | Weatherproof outlet present (if specified), functional | ☐ |
| Waterproofing membrane | Check threshold between balcony and interior — silicone seal must be complete | ☐ |
Parking Space
| Item | What to Check | ✓ |
|---|---|---|
| Location matches SPA | Parking number corresponds to your unit as specified in the contract | ☐ |
| Size | Adequate for standard vehicle, columns do not obstruct door opening | ☐ |
| Access | Key fob or access card works for barrier/gate, test entry and exit | ☐ |
| Floor surface | Epoxy coating intact, no major cracks, no oil stains from construction | ☐ |
| Lighting | Adequate lighting in your bay and approach areas | ☐ |
Common Areas (Observe During Your Visit)
| Item | What to Check | ✓ |
|---|---|---|
| Lobby and corridors | Finished to promised standard, lighting operational, no construction debris | ☐ |
| Elevators | All operational, floor buttons work, smooth ride, emergency phone functional | ☐ |
| Fire safety | Fire extinguishers in corridors, emergency exit signs illuminated, stairwell doors work | ☐ |
| Amenities | Pool, gym, and other promised amenities completed — note anything incomplete | ☐ |
| Mailbox | Assigned to your unit, key works | ☐ |
How to Document Defects Properly
Thorough documentation is crucial. Developers respond better to well-organized snagging reports, and if disputes arise later, your records become evidence. Follow this system:
- Number every defect sequentially: Start at 1 and continue through the entire property. A typical new apartment might have 50–150 snags; villas can exceed 300.
- Photograph each defect: Take two photos per item — one wide shot showing the location in the room, and one close-up of the specific defect. Enable date and time stamps on your camera.
- Mark the location: Place blue painter's tape next to each defect before photographing. This makes it easy for the developer's team to find the exact spot.
- Categorize by room: Group defects by room in your report (as per the checklists above).
- Rate severity: Mark each item as Critical (safety/structural issue, must fix before handover), Major (significant defect affecting function or appearance), or Minor (cosmetic issue, can be fixed post-handover if needed).
- Reference SPA specifications: If a defect involves a different material or finish than promised, cite the specific SPA clause or brochure page.
Live DLD data
When will your building actually hand over?
Track any Dubai project's official construction percentage and expected completion — re-verified against the DLD registry twice a week. Get an email only when it moves.
Submitting Your Snagging Report
Once your inspection is complete and documented, submit the report to the developer properly:
- Submit in writing: Email the report to the developer's handover or customer care team. Do not rely on verbal promises.
- Request acknowledgment: Ask for a written confirmation that they have received and reviewed your list.
- Keep copies: Save the original report, all photos, and email correspondence. Back up to cloud storage.
- Set expectations: Request a timeline for when each category of defect will be addressed.
- CC relevant parties: If you have a real estate agent or property consultant, copy them on the email for additional pressure and documentation.
Developer Response Timeline
After receiving your snagging report, here is what to expect:
| Stage | Typical Timeline | Notes |
|---|---|---|
| Acknowledgment | 3–5 business days | Developer confirms receipt and assigns a coordinator |
| Assessment | 1–2 weeks | Developer's team inspects reported items |
| Minor repairs | 2–4 weeks | Paint touch-ups, hardware adjustments, sealant fixes |
| Major repairs | 30–60 days | Tile replacements, plumbing rework, countertop replacements |
| Re-inspection | After developer notifies completion | You verify all items have been resolved to satisfaction |
Be patient but persistent. Follow up every two weeks with a polite but firm email referencing the original report and requesting a status update on each item.
What If the Developer Refuses to Fix Defects?
Most reputable developers in Dubai address snagging items promptly — their reputation depends on it. However, disputes do happen. If the developer refuses to fix legitimate defects or is excessively slow, you have several options:
- Escalate internally: Move your complaint from the customer service level to senior management or the project director. Written complaints to managing directors often accelerate action.
- Withhold handover signature: If defects are severe and unresolved, you are within your rights to delay signing the handover certificate until critical items are addressed. However, be aware that developers may charge you for delays if the defects are genuinely minor.
- File a complaint with RERA: The Real Estate Regulatory Agency accepts complaints against developers. Visit the Dubai Land Department website or the Dubai REST app to submit a formal complaint. RERA can mediate and has the authority to compel developers to fulfill their obligations.
- Engage a lawyer: For significant defects (structural issues, major specification changes, waterproofing failures causing damage), consult a real estate lawyer. Legal letters often prompt faster action than informal complaints.
- Contact the Dubai Land Department (DLD) Rental Disputes Centre: Despite its name, this body also handles ownership disputes related to property quality and developer obligations.
Common Defects Found in Dubai New Builds
Based on thousands of snagging inspections conducted across Dubai's new developments, these are the most frequently identified issues:
| Defect Category | Frequency | Typical Examples |
|---|---|---|
| Paint and wall finish | Very common (90%+ of units) | Roller marks, uneven coverage, drips, color variation between walls, nail pops |
| Tile and grouting | Very common | Hollow tiles, uneven grout lines, chipped corners, lippage between tiles, missing grout |
| Door and window alignment | Common (60–70%) | Doors rubbing on frames, windows not locking, gaps in seals, misaligned handles |
| Plumbing issues | Common | Slow drainage, low pressure, minor leaks under sinks, toilets not flushing fully |
| Kitchen cabinetry | Common | Misaligned doors, soft-close not working, drawer runners bent, scratched surfaces |
| Electrical faults | Moderate (30–40%) | Dead outlets, reversed polarity, light switches controlling wrong fixtures |
| Sealant and caulking | Very common | Missing silicone around baths, gaps at countertop-wall junctions, incomplete window seals |
| AC performance | Moderate | Rooms not cooling adequately, condensation drips, unusual noises from FCU |
| Countertop defects | Moderate | Chips on edges, unpolished cuts, uneven joints, staining from construction |
Snagging a Villa vs an Apartment
While the fundamental inspection principles are the same, villas present additional areas that apartments do not have. Here is what to add to your checklist when snagging a villa:
Additional Villa Snagging Items
- Exterior walls and facade: Check render finish, paint consistency, any cracks, and that all exterior materials match specifications.
- Roof: Inspect for proper waterproofing membrane, drainage outlets, any ponding of water, and condition of parapets. Access the roof if possible.
- Garden and landscaping: Verify soil quality, irrigation system works, boundary walls and gates are finished, external lighting functions.
- Driveway and hardstanding: Check for level surfaces, proper drainage, no cracking in interlock paving.
- Swimming pool (if included): Test pump and filtration, check tile finish, verify heating works, inspect coping stones and overflow channels.
- External utilities: DEWA meter location, water tank, external AC compressor units (properly mounted, no vibration), gas meter.
- Boundary walls and gates: Height as per specification, gate automation works, intercom from gate to villa functions, no cracks in boundary walls.
- Garage: Door mechanism works, sensor stops door when obstructed, internal lighting, power outlets present.
- Staircase (if multi-story): Handrail secure, balusters firm, consistent step height (measure several), treads not slippery.
- Maid's room and laundry: Often lower finish quality than main rooms — check everything as carefully as main bedrooms and bathrooms.
The Second Snagging: Re-Inspection After Repairs
Once the developer notifies you that repairs are complete, schedule a re-inspection. This step is critical and often overlooked. Here is how to approach it:
- Bring your original report: Go through every item on your list and verify it has been properly fixed — not just patched over quickly.
- Check for new damage: Repair work sometimes causes new issues. Workers fixing tiles might scratch adjacent surfaces. Plumbing repairs might leave marks on walls. Inspect the surrounding area of every repair.
- Test functionality again: Do not just visually inspect — turn on every tap, flush every toilet, open every window, test every outlet again.
- Document unresolved items: If any snags remain unfixed or poorly repaired, create a second snagging report with only the outstanding items.
- Set a final deadline: Communicate clearly that outstanding items must be resolved within a specific timeframe before you escalate.
Some buyers go through three or even four rounds of snagging before they are satisfied. This is perfectly normal and within your rights, especially for higher-value properties.
Snagging After Handover: The Defect Liability Period
Even after signing the handover certificate, you have protection during the defect liability period (DLP). Here is what you should know:
- Non-structural defects: Covered for 1 year from the handover date. This includes paint issues, cabinetry defects, minor plumbing leaks, appliance malfunctions, and sealant failures.
- Structural defects: Covered for 10 years from the building completion certificate date. This covers foundation issues, load-bearing wall cracks, waterproofing failures, and structural column problems.
- How to report: Contact the developer's after-sales or facilities management team in writing. Most major developers have dedicated portals or apps for post-handover defect reporting.
- Keep records: Maintain a log of every defect reported during the DLP, including dates, reference numbers, and resolution status.
Final Advice for Off-Plan Buyers Approaching Handover
Your snagging inspection is not a confrontation with the developer — it is a quality assurance process that benefits both parties. A well-snagged property means fewer maintenance issues, fewer complaints, and better resale value. Here are the key takeaways:
- Never rush the handover. Take the time to inspect thoroughly, even if the developer pressures you.
- Invest in professional snagging for units worth over AED 1 million. The cost of AED 1,500–3,000 is negligible compared to the value of catching hidden defects.
- Document everything in writing. Photos, numbered lists, emails — create a paper trail from day one.
- Know your rights. RERA and Dubai Land Department exist to protect buyers. Use these channels when needed.
- Do not sign under pressure. The handover certificate is the most important document you will sign after the SPA. It confirms you accept the property in its current condition.
- Schedule the re-inspection. First snagging without follow-up is wasted effort. Verify every repair.
- Set a DLP reminder. Do a final inspection before your 1-year warranty expires.
A thorough snagging inspection is the difference between a smooth move-in and years of frustration with unresolved defects. Take this process seriously, use the checklists in this guide, and ensure your new Dubai property meets the standard you are paying for.
Thinking About Buying?
Get a free, no-pressure consultation on your Dubai purchase plan.
Thank You!
We'll get back to you within 24 hours.
Mortgage Brokers in Dubai
Explore providers from our business directory
Still have questions?
Ask a follow-up, or get connected with a vetted Dubai professional.
Join our Telegram channel
Handover alerts, new launches & DLD data — first, in real time.